Adding a photo to a Signs asset
Download document of instructions to view later
If you don't already have your sign selected, you can search for it using the Traffic Asset Search page:
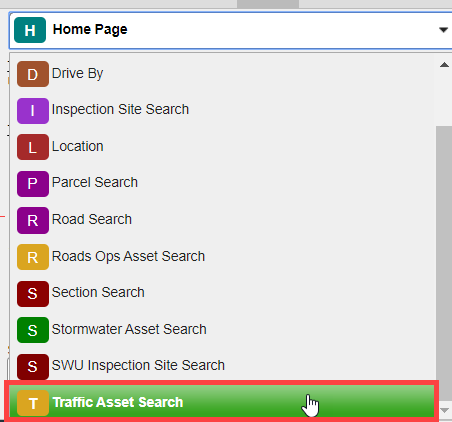
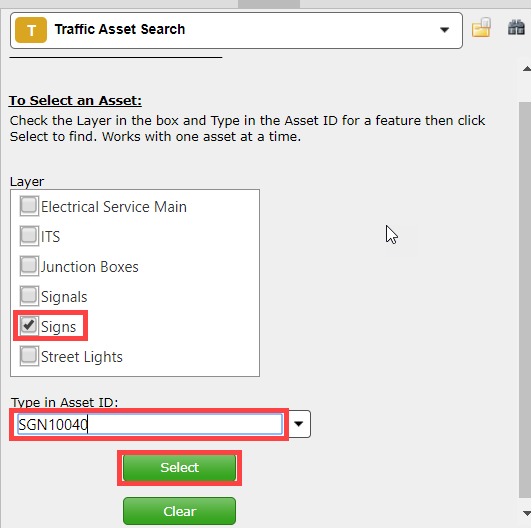
Check for Signs, type in Asset ID and select Search
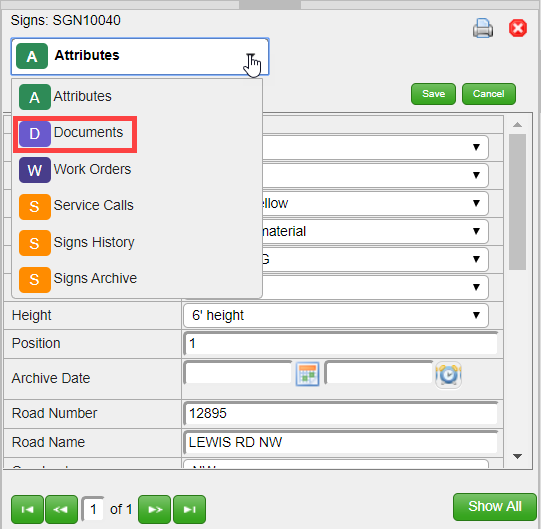
The Attributes for the Sign will show up, so then do the dropdown to get to Documents
Now you can add a document like a photo (or something else), or you can click on FileName link to see already attached photo in this case
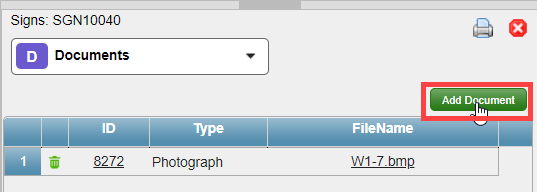
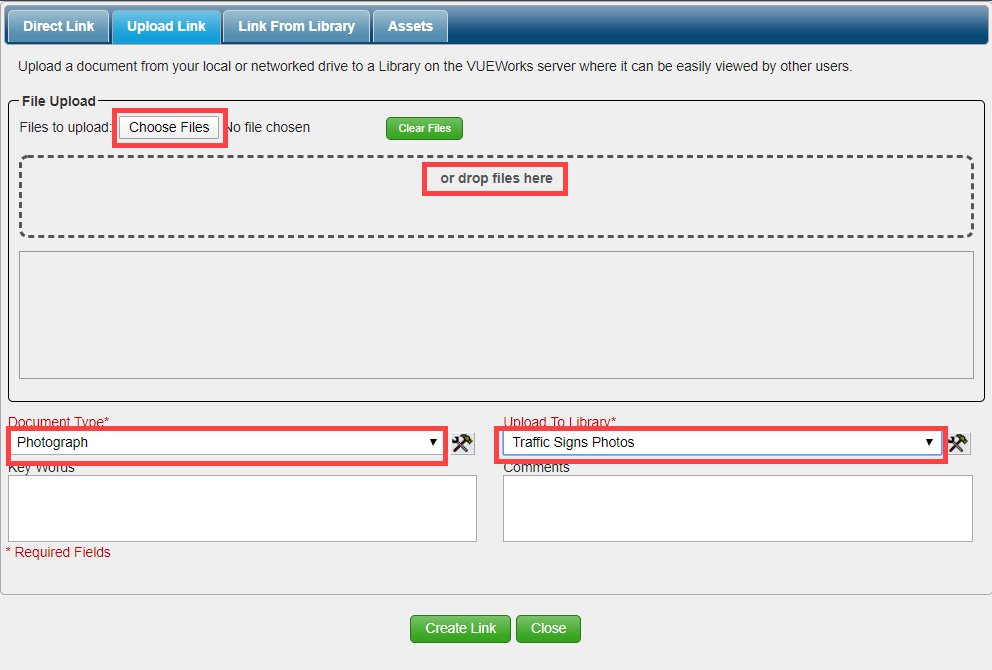
To add a Document or photo, browse to the photo or drag into indicated area from Windows Explorer to the indicated area.
Note: You have to indicate what kind of document (Photograph) and location you want it to be stored at (Traffic Signs Photos)
Recommend using a naming convention for the photo like the asset ID and date, adding time as well if more than one photo to be added. Example: Rather than existing W1-7.bmp call it SGN10040_03_10_2020_10_23am.jpg or whatever you photo extension type it is. (Note : is not an acceptable format for a file name)
Task now completed
Return to Traffic Operations Tutorial page